
Like many people, I was told from Darkhorse Racing that the Tremec would fit without any modifications. I did some measurements and asked a few people who had done the swap if this was true. Some said yes and some said no. Darkhorse claimed that if you used their cross member that it would fit without modifications. At one point the people with whom I spoke with wondered if the automatic cars had different transmission tunnels than the manual cars. Further research concluded this to be false. The manual and automatic transmission tunnels are the same. It was also speculated that due to manufacturing tolerances that the Tremec would fit in some vehicles and some it did not. I measured a few Mustangs and found that the transmission tunnel and cross members on all the cars I measured to be within .25 in. of one another. The tolerances, even if stacked, wouldn't make a significant difference, at least not enough to make it a factor.
September 2002
After exhausting my resources and taking measurements, I decided I would try to install the Tremec without cutting the transmission tunnel.
My first attempt was to just bolt the transmission in and see what hit. After installing the transmission I discovered at the very least the transmission
tunnel support would need to be cut, as Horsepower TV had done, or removed completely. I really didn't like the idea of cutting or removing the
tunnel support. So I choose to remove the support and re-install it two inches farther back. On the Tremec there is a recess between the shifter
and the transmission. If the tunnel support is notched it would fit in between.
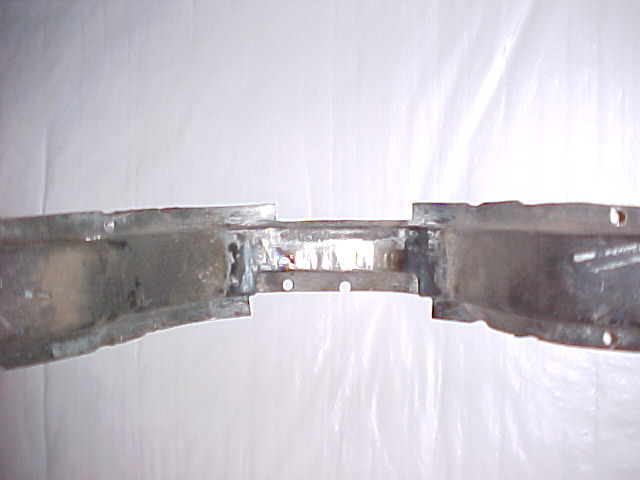
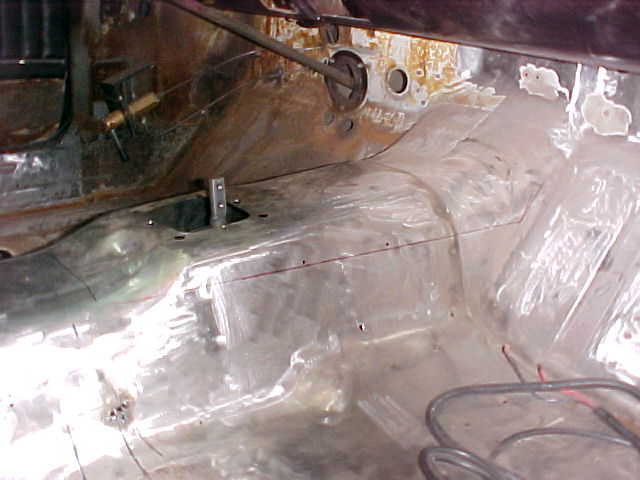
I notched the support and was able to fit it so that the stock cross member and mount could be retained.
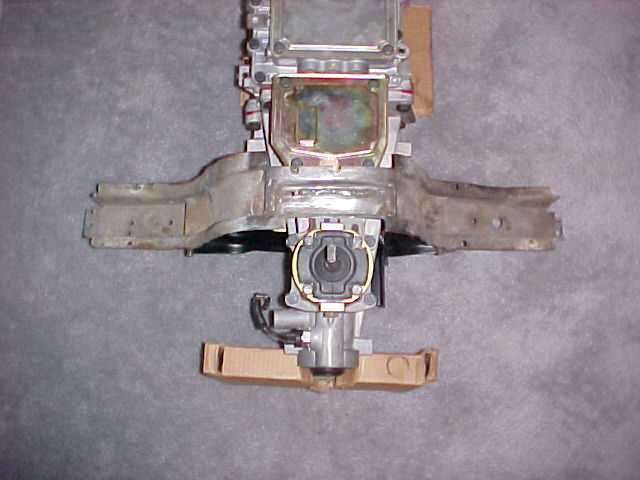
(Tremec with notched support and stock cross member and mount.)
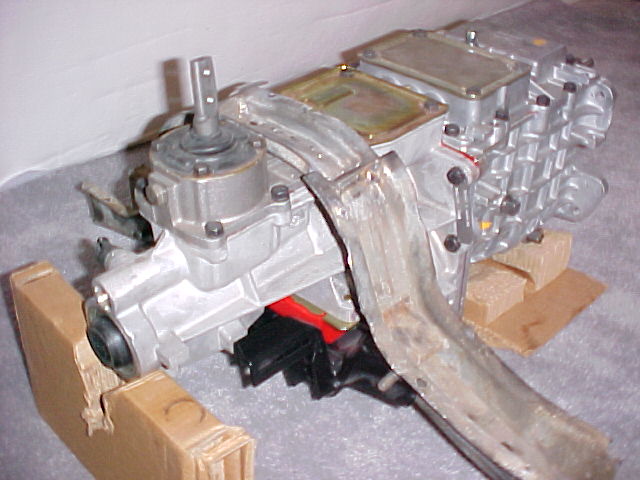
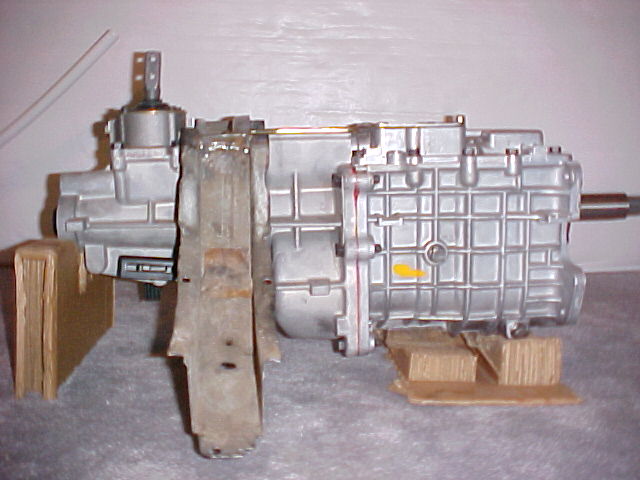
Everything fit great! With a little hammer persuasion I moved the floor support back the two inches and the Tremec fit under the stock tunnel. The transmission angle at this point was 6 degrees. The cross member that Darkhorse and others supply will allow the transmission to be installed at the same angle. So either way, pay for a new cross member or use the stock piece 2 inches back, the transmission will sit at 6 degrees.
The 6 degrees the Tremec was angled concerned me. Back to more research.
November 2002
After more research and speaking with various people, I noticed that the angle issue was split down the middle between those that determined
6 degrees with the proper drive line angles was OK, and those that determined that 6 degrees of Engine and transmission angle was too much.
If drive line angles where the only factor to be concerned with, I would agree that 6 degrees would be satisfactory. With the proper drive line
angles drive shaft harmonics could be minimized. Mustang having a front sump oil pan and the Tremec having the drain at the front I decided
there was more to factor then just drive line angles to make the swap function at its best. An E-mail to Tremec confirmed my suspicions and
the transmission, like the engine, was designed to have it's normal ride angle of 2-3 degrees.
March 2003
After several measurements and trial installations. I could not fit the Tremec into my 65 Mustang without altering the transmission tunnel. At
this point I had to decide how I was going to take on the task. I have never done sheet metal work and didn't even know where to start! So I
jumped in head first and cut out the floor. With the transmission tunnel top removed the transmission could now be installed at the proper operating angle.
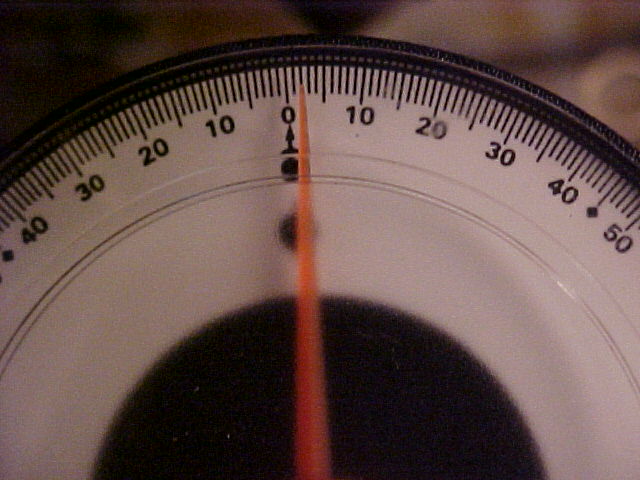
With the chassis level and the transmission at 3 degrees the transmission tunnel needed to be approximately 2 inches higher.
I was uncomfortable removing the transmission tunnel support and allowing the tunnel to go unsupported. I had some 3/16 strapping stock sitting in my garage that would work in a pinch to support the tunnel. I started by cutting a hanger and making a mock up piece to get the right angles and radii in the bends. I cut the pieces longer then necessary and began bending the straps. After a lot of work (those suckers where hard to bend) I was able to match the shape of the hanger model. A few quick checks and adjustments and the new supports fit perfect.
With the transmission at 2 degrees I located the straps a half inch above the transmission at its closest points. After a final fit I seam welded the straps in place. Now I was ready to give the sheet metal a try. I went to a local sheet metal fabricator and bought a 2'x3' sheet of 18 gauge metal. I also went to my local hardware store and purchased a sheet of galvanized tin. Placing the galvanized tin over the hump and bending it with my hands to get a final shape was discouraging. I waited a few days to come up with ideas and none came! So again, I leaped in head first and gave it my best shot. Using a 2x4 on the floor I was able to bend the approximate radius I needed. Bending and moving a half inch or so and bending again. The 18 gauge metal was actually easier to work with than the tin! After bending a close shape I fit it onto the transmission tunnel.

The sheet metal at this point wasn't even close. I needed to make the piece more manageable so I cut the passenger side with extra to fit the hole.
Once the passenger side was cut I focused my efforts on that side forming the metal to get a better fit. When the passenger side was a closer fit I moved to the driver side. I noticed that when I switched sides the piece would move and it was hard to know exactly where I needed to bend. I drilled a hole in each of the straps and then drilled holes into the sheet metal. With the holes drilled and the sheet metal bolted to the straps, the bolts located the work and allowed me to form the metal much easier. I was no longer fighting myself. I decided to make the tunnel wider and more specifically less angled on the passenger side. After a lot of bending and hammering, the piece was finally coming together.
I was going to make the transmission tunnel all from scratch, but changed my mind once I looked at the old tunnel piece and how my piece was coming together. I decided it would be stronger and better looking if I used part of the old tunnel. I had to weld small pieces to the back portion of the old sheet metal to make it match the new wider tunnel.
With the tabs welded to the preexisting back section, I formed it to fit the new transmission tunnel and tack welded it into place. The whole piece was ready to be welded. I began tack welding and shaping the tunnel going from side to side working towards the front. Everything fit so well it was amazing! It was almost as if the sheet metal was doing all the work! The piece went right into place. My careful measuring paid off. I had a little trouble towards the front of the car were I actually formed the car to fit the new tunnel. No problem a little hammer work couldn't solve in a few minutes. With the Tremec bolted in place I determined where the shifter would go. I drilled a 2" hole with a hole saw I bought at the same above mentioned hardware store. The shifter hole was off center quite a bit so using a template made from card stock I traced the larger finished hole and cut it with a jigsaw. 2 dull blades later it was complete, don't ask!

The transmission tunnel is now ready for the final seam weld.
I had contemplated what I was going to do for a cross member now. I remembered in my previous conversations speaking with someone who had used a late model Mustang cross member. (He has an excellent write up of his Tremec install on the web.) After determining that the old cross member could not be retained I found an automatic cross member on E-bay and bought it. When the cross member arrived it had been altered by the previous owner and had been cut. I choose to shorten the tubes to fit inside some square tube I bought at a local metal supplier. With the tubes shortened I made the cross member "ears" to fit the late model cross member. The passenger side floor needs to be raised a bit to clear the late model cross member. I did this by using my trusted Harbor Freight hammer and dollies. After careful measurements and a few test fits I tack welded the ears into place.
The Tremec sitting on the new cross member has an angle of 3 degrees, which is acceptable. Now all that remains for the transmission tunnel are the final welds.
Retrospective
The only thing I would have maybe done different, is the use of a 2000-on transmission crossmember. I think it might be easier to fabricate,
lighter and it would allow more room for exhaust. The down side of the 2000-on crossmember is it will not provide as much chassis structure
as the 79-95 crossmember provides.If you use 79-95 crossmember, buy an automatic or one from Ford MotorSports and use the full back
position to fit the Tremec. This will allow you to use all of the transmissions available to the 79-95 cars. I cut mine because it was already
modified. If I wanted to change transmissions I will now be limited to the Tremec or AOD transmissions unless I modify the cross member.
With this swap there are many clutch options available. I choose to use a Mustang Steve weld on quadrant which uses a late model Mustang cable clutch. {available from Mustang Steve?s site} a Lakewood scattershield, and a Long style clutch.
If you use a Lakewood scattershield as I did, you can use either the original clutch linkage or a cable clutch. A Cobra R or SROD bell housing will require making or buying a block to use the stock linkage. These are available from Darkhourse, Mustangs Plus, or National Parts Depot. With a cable clutch you have the choice to use a diaphragm or long style pressure plate. If you use a long style you will need a special clutch fork to clear the pressure plate. These modified forks can be purchased from RAM Clutches. If you use your stock linkage and clutch fork you can retain the same long style clutch from the early Mustang.
When using an aftermarket bellhousing make sure you dial it in to insure proper flywheel clearance and to avoid input shaft binding at high RPM. If you have excessive bellhousing run-out, offset locating dowels can be found from Lakewood in various offsets.
Tremec has a great web site available where you can download their 51 page owners manual for FREE! The owners manual includes specifications and torque values, as well as break in and maintenance procedures.
Tools I used for the job:
Harbor Freight hammer and dolly set
Old Black & Decker jigsaw.
3 metal jigsaw blades
4" electric grinder (not necessary but makes it a lot easier)
2 bolts
2 nuts
Harbor Freight Degree gauge
My sweet Milwaukee cordless drill
2" hole saw
Miller mig welder.
Materials:
Sheet of 18 gauge metal 2?x3?
1?x3" square tube 3/16 thickness
3?x1" Strapping material 3/16 thickness
Tremec 3550 or TKO, TKOII
Cross member options:
Ford automatic cross member P/N E6ZZ-6A023-A
Ford MotorSport adjustable cross member P/N M-5059-A
Bell housing Options:
Ford MotorSport Cobra P/N R M-6392-R58
Junkyard SROD 4 speed 80-84
Lakewood Scattershield P/N 15202
McLeod scatter shield P/N 16100
Ford MotorSport universal safety bell housing P/N M-6392-C (allows use of T-5 or Tremec)
Good luck, Mike Schlutter (SundanceKid)
If you'd like more information, Mike's email address is [email protected]